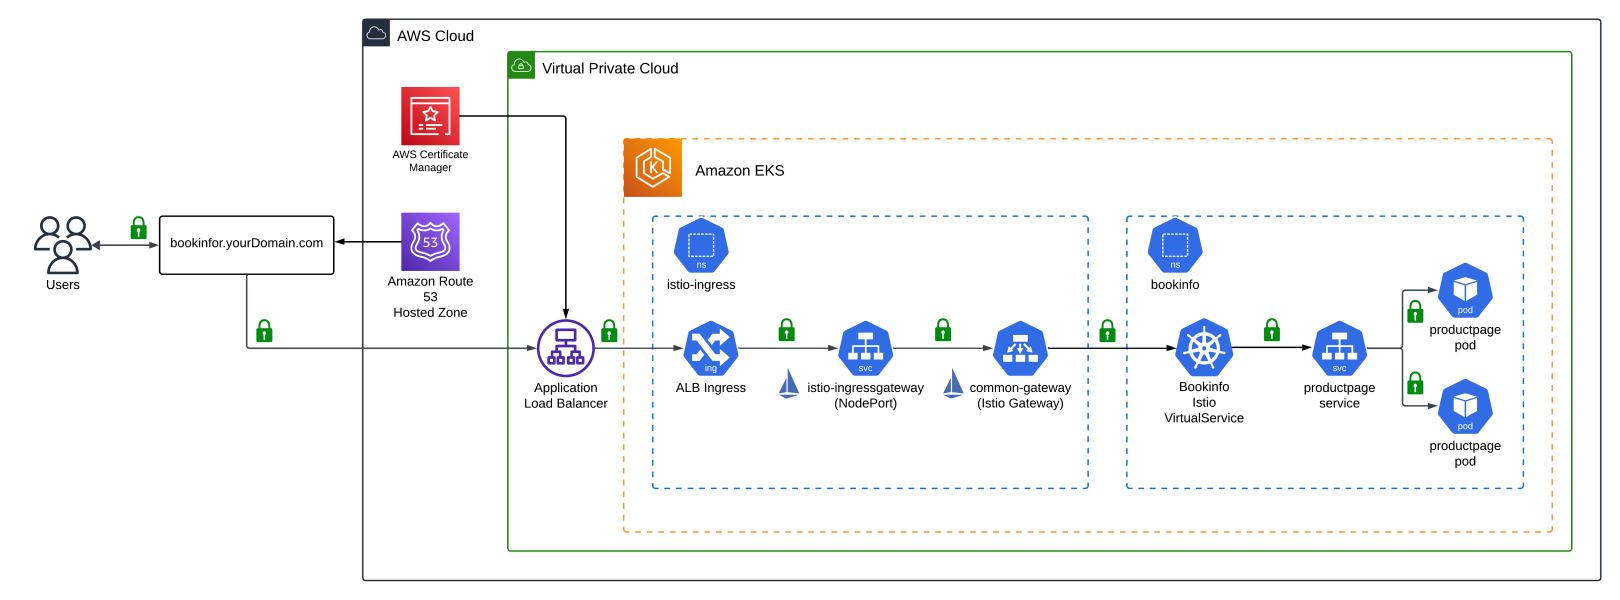
This is the second part of the series on Using Istio, a Service Mesh, with Amazon Elastic Kubernetes Service (EKS). The first article discussed what a Service Mesh and Istio are, what technologies we will use, the prerequisites and architecture overview, and the configuration and setup  process.
In this part two article, we will be working on these tasks.
- Configure access to Amazon EKS Cluster
- Install Istio CLI tool - istioctl
- Run the "configure.sh" script to configure the Flux Repository
- Install Flux to the Amazon EKS Cluster
- Review Addons and Applications managed by Flux
- Discuss the Istio Components and Addons used by Istio.
- Review how Istio works with Applications and Microservices
You can access the code in my GitHub Repository
Configure access to Amazon EKS Cluster
Amazon EKS Cluster details can be extracted from terraform output or by accessing the AWS Console to get the name of the cluster. This following command can be used to update the kubeconfig in your local machine where you run kubectl commands to interact with your EKS Cluster. Navigate to the root of the directory of the GitHub repo and run the following commands:
cd terraform


AWS_REGION=$(terraform output -raw aws_region)

EKS_CLUSTER_NAME=$(terraform output -raw eks_cluster_name)

aws eks --region $AWS_REGION update-kubeconfig --name $EKS_CLUSTER_NAME
Results of configuring kubeconfig.

Install Istio CLI - istioctl
Step 1. Install Istioctl CLI
- For macOS or Linux, follow these instructions using Homebrew
brew install istioctl
- For Windows, using Chocolatey, follow these instructions.
choco install istioctl
- For Windows, using Scoop, follow these instructions.
scoop bucket add main

scoop install main/istioctl
- Install instructions for other methods can be found here.
Step 2. Instructions on how to use istioctl can be found here and here.
Step 3. Verify that istioctl is installed by running the following command.
istioctl version
Step 4. Result of running istioctl.

Configure and Install Flux
Step 1. Configure Variables needed to install Flux
export GITHUB_TOKEN='<REPLACE_WITH_GITHHUB_TOKEN>'

export GITHUB_USER='<REPLACE_WITH_GITHUB_USER>'

export GITHUB_OWNER='<REPLACE_WITH_GITHUB_OWNER>'

export GITHUB_REPO_NAME='<REPLACE_WITH_GITHUB_REPO_NAME>'
Step 2. Configure the Flux Repository by running the "configure.sh" script. The "configure.sh" script updates the various applications with the necessary values to run correctly. Navigate to the root of the directory of the GitHub repo and run the following commands:
cd scripts


./configure.sh

cd ..
Step 3. Results of running the "configure.sh" script.

Step 4. Install Flux on the Amazon EKS Cluster
flux bootstrap github \

  --components-extra=image-reflector-controller,image-automation-controller \

  --owner=$GITHUB_OWNER \

  --repository=$GITHUB_REPO_NAME \

  --private=false \

  --path=clusters/eks-istio-lab \

  --personal
Step 5. Results of installing Flux on the Amazon EKS Cluster.

Managing Flux
Managing Flux is handled by using the Flux CLI. Flux does not come with any Web or UI interface to manage Flux. Please click here if you would like more information on the Flux CLI.
The following are some commands you can use to manage Flux.
flux get all

flux get sources all


